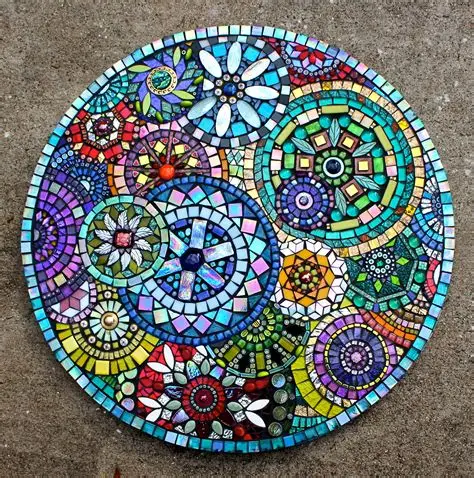
Mosaic Art Program
INTRODUCTION:
Mosaics are one of the oldest Jewish art forms. This program explores a few, ranging from ancient synagogue floors, mid-century synagogue installations, and modern art today — all built from small, imperfect pieces forming something whole. Then you get hands-on, making art that requires no prior experience. Great for individual art or for working together on a communal piece like a mosaic table for your porch!
PROGRAM OUTLINE (2 hours):
- Welcome & framing (5 min) — Set tone, introduce the idea that today is about making and looking at how small pieces become something whole.
- Visual survey & discussion (20-25 min) — Explore examples of Jewish mosaic art
- Introduction to Materials (10 min) — Explain the details of your chosen project, orient to any tools, etc.
- Hands-on making (60 min) — The main event. Individual mosaics at their own pace, or collaborative work on one shared piece.
- Gallery walk & closing reflection (15 min) — Everyone’s pieces (or the one group piece) displayed together; short reflective closing tying back to the “pieces becoming whole” idea.
- Wrap-up (5 min) — Logistics
MATERIALS:
- Tables + tablecloths or protective covering
- Printed “source sheets” with examples of Jewish mosaics (one set per 2-3 people)
- Trash bags / wipes for cleanup
- If outdoors: a weighted-down cover or other way to keep small pieces from blowing away
- Music/speaker if you want ambient music during the making portion
For sticker mosaics:
- Sticker mosaic kits (pre-cut sticker pieces + backing board), enough for individual projects, or one large board for the group version
- Extra blank cardstock/board if anyone wants to freestyle beyond a kit
For bedazzling:
- Rhinestones/gems, fabric or craft glue
- Small trays or cups to sort gems by color
- Backing surface (tote bags, frames, small boxes, or boards depending on what you want people to bedazzle)
For traditional tile mosaics:
- Mosaic tiles or tile shards (glass, ceramic)
- tile nippers + safety glasses
- Adhesive (mosaic glue or thinset)
- Grout, mixing container, grout float, sponges, water bucket
- A rigid backing board or surface per project (wood board, tile, terracotta pot, etc.)
- Curing/drying space — traditional mosaics likely can’t be finished same-day if grout needs to set, so plan for a take-home step or a “reveal” at a later gathering
SETUP:
Indoor setup: Arrange tables in small clusters (2-3 people) for the discussion portion, then either keep clusters for individual making or reconfigure into one larger shared table for the group mosaic option. Cover tables with protective covering, especially near the traditional tile/grout station.
Outdoor setup: Same cluster layout on a patio/backyard table setup; secure loose materials (stickers especially) against wind, and have a shade/tarp backup in case of sun or light rain. Keep a designated “wet/messy” zone away from seating if using grout.
FACILITATION NOTES:
- Soft background music during the making portion helps hold a relaxed, communal mood. Think low-key acoustic or instrumental, not something that competes with conversation.
- Keep the photo sheets visible/accessible on tables throughout the session, not just during the discussion window, so people can glance back at them while working.
- If you’re doing one big communal piece, having a simple pre-sketched guide design (even just an outline of a Star of David, tree, or abstract shape) gives people a shared structure to work within without over-directing their choices.
Welcome and Framing (5 minutes)
Here’s an example of what you can say to set the tone for the space:
- “Thanks so much for being here today. We’re going to spend the next two hours or so making something with our hands, but before we start gluing anything down, I want to take a few minutes to look at where this art form actually comes from.
Mosaics have been part of Jewish life for a really long time. Some of the oldest surviving Jewish art we have is mosaic floors in ancient synagogues, over a thousand years old. And it’s shown up again and again since then, all the way through today, including in some pretty unexpected modern places.
Mosaics are made entirely out of small, separate pieces – sometimes broken, uneven, imperfect pieces. They only become an image once they’re placed together. No single piece tells the whole story on its own.
I think that’s true of communities too. The art we make today is like a miniature model of how a group of individual people can build something whole together.”
Visual Survey & Discussion (20-25 minutes)
- SAY: “Take a few minutes in pairs or groups of 3 to look through these images before we start making. There are discussion questions on the first page.”
- Use these “source sheets” with examples of Jewish mosaics
Introduction to Materials (10 minutes)
- Explain the details of your chosen project
- If you are doing a group project, explain your vision for its eventual use
- Orient to any tools
- If you’re using traditional tile and have some tile nippers for people to use, be sure to demo safe cutting technique and explain the importance of safety glasses
Hands-on Making (60 minutes)
This is the main event! You have many options for what craft/s to offer:
- sticker mosaics (like color-by-number but with stickers)
- bedazzling (art made with glued-on rhinestones or flatback gems)
- traditional mosaics made with glass, stones, tile, porcelain, ceramic, or any other material.
You can also choose to have participants make their own individual pieces (freestyle art or decorating something like a box, picture frame, mezuzah, hamsa, etc.) or work all together on one big project (wall art, a mosaic table for the house, etc.). With so many options, you may be tempted to make room for everything, but this event works best with one kind of craft at a time. You can always run another event if there’s energy for more!
- Give a “10 minutes left” verbal warning before wrapping the making segment so people can reach a natural stopping point.
Gallery Walk & Closing Reflection (15 minutes)
- Physically display all pieces together (even individual ones) so the room visually becomes its own mosaic of finished work — that’s a small, powerful way to reinforce the metaphor without over-explaining it.
- Closing reflection can be informal — invite a few voices rather than going around the whole circle, especially in a 6-10 person group where forced participation can feel heavy-handed.
Wrap-Up (5 minutes)
- Give any necessary instructions for taking home unfinished or still-wet projects
- If you’re doing a group piece and it isn’t finished/grouted yet, name that explicitly and build anticipation for when it’ll be revealed (e.g., “we’ll keep working on this over the next few weeks at all our house events” or “we’ll unveil this finished at Shabbat dinner next month”).
- Thank everyone for coming!