Jewish Holiday, Passover
4 Easy DIY Seder Plates
By Liza Moskowitz, MHWOW Associate Director
As a kid, there were only two types of seder plates in my family. We had multiple ornate seder plates that my grandma probably gifted us from the synagogue gift shop. The others were drastically different. Handmade by me in first grade during religious school, my seder plates were perfectly colored with illegible labels. And honestly, there was nothing in between.
Now as a young adult, I don’t have any seder plate options. And if you’re in the same situation, keep reading. A seder plate is a TL;DR version of the seder to me. The plate holds the ceremonial foods around which the seder is based: matzah, shankbone, egg, bitter herbs, charoset, and karpas. Whether you include these six items or maybe add something extra, check out how you can DIY your own seder plate this year.
Quick lessons I have learned:
1. Make sure you thoroughly clean your white plate first, rinse, and let dry completely.
2. Use oil-based non-toxic permanent markers or paint pens.
3. For the artistically-challenged: lay down your color “filling” first and wait for everything to completely dry. After, you can go back and outline your shapes in black for more definition.
4. Leave the plate in the oven for the recommended “bake” time and while the oven completely cools down.
5. Hand wash your plate; dishwashers can be too harsh and cause your colors to fade or completely erase.
 While this idea is very easy to execute, it does require you to have specific Lego sizes in different amounts. All the pieces that are needed are standard sizes, so you should have enough in a generic set that you have at home (or at your parent’s home). With a construction time of less than 10 minutes, you can have a creative seder plate that will make you feel like a kid again!
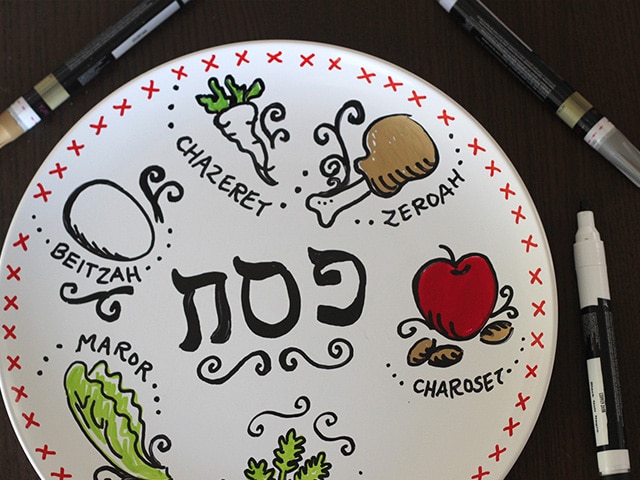
If you like arts & crafts, draw your own seder plate.
I googled “baked sharpie plate” and found dozens of instructions online. However, each instruction offers a little something different. This one has worked the best for me in the past. I liked using this seder plate printable guide because I am not confident in my drawing skills. Flip the guide backwards, trace the lines with a pencil and then re-trace them onto your plate for a guide.
Quick lessons I have learned:
1. Make sure you thoroughly clean your white plate first, rinse, and let dry completely.
2. Use oil-based non-toxic permanent markers or paint pens.
3. For the artistically-challenged: lay down your color “filling” first and wait for everything to completely dry. After, you can go back and outline your shapes in black for more definition.
4. Leave the plate in the oven for the recommended “bake” time and while the oven completely cools down.
5. Hand wash your plate; dishwashers can be too harsh and cause your colors to fade or completely erase.
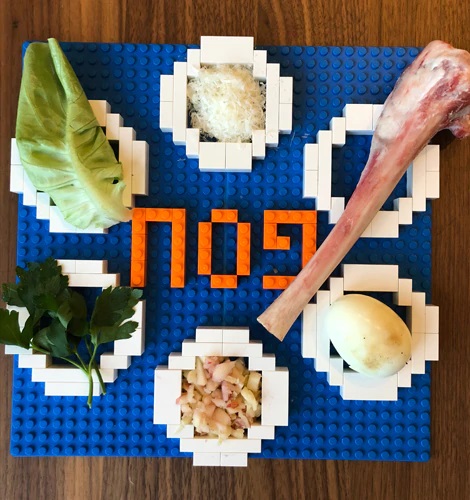
If you like to build things, construct your own Lego seder plate.
While this idea is very easy to execute, it does require you to have specific Lego sizes in different amounts. All the pieces that are needed are standard sizes, so you should have enough in a generic set that you have at home (or at your parent’s home). With a construction time of less than 10 minutes, you can have a creative seder plate that will make you feel like a kid again!